
Cloudy, discoloured and hazy headlights ?
It is the number one thing that can let down the look of any modern car. You could spend literally hours doing a full clean and detail on your car and still it will look rubbish if your headlights are just a fogged up mess.
I am not going to go into the 'why' it happens as most people know it is a combination of UV rays, contaminants, tree sap, road debris etc. Rather I am going to give you some advice on how to deal with it, which methods are better and which ones to avoid.
The Rubbish- there are a ton of videos out there on YouTube and websites giving you the "best way" to fix discoloured headlights. These range from WD-40, toothpaste, nut shells you name it !
Whilst you may see some short term benefits, in reality these will be short lived and in a short space of time you will be back to square one, so pretty pointless.
Then you get these all in one products or kits. Such an example is the Meguiars Headlight restoration kit which comprises of a scotchpad, cleanser and then spray. This last part is the problem. Whilst the scotch pad and cleaner is fine, it really just cuts the rubbish off the headlight but it is the sealer or spray that is difficult to get right. It is essentially like clear coat or lacquer and provides a film/coating. This is then meant to dry clear but it does not lie well, is prone to picking up dirt and dust particles and just looks horrible. Best avoided.
Best method- there is no shortcut here, it is a lot of hard work and elbow grease. You can make your life easier and cut the work down with a machine polisher but if you don't have that available, then it is all hand work.
Basically you are sanding the headlights and then protecting them. You are wet sanding in this process so get yourself familiar with the difference between wet and dry sanding. You will need various grades of wet and dry sandpaper (generally black in colour) ranging from 240 through to 2000-3000. The lower the number the more abrasive the grade but the lowest number is not necessarily the grade you need to start with. This is dependant on how bad your headlights are, the level of discolouration etc so I advocate starting with a medium grade, say 400 and if that is not enough then use a lower grade and then work back up.
Example : the aim is to remove all the film and grime and discolouration but the lower the grade the more scratches you will introduce so you need to find the right balance. So if its bad and you start with 600 and it makes a difference then great you can move on but if it still looks discoloured then drop to 400 and look again. If it is clear of discolouration then go back to 600 and so on.
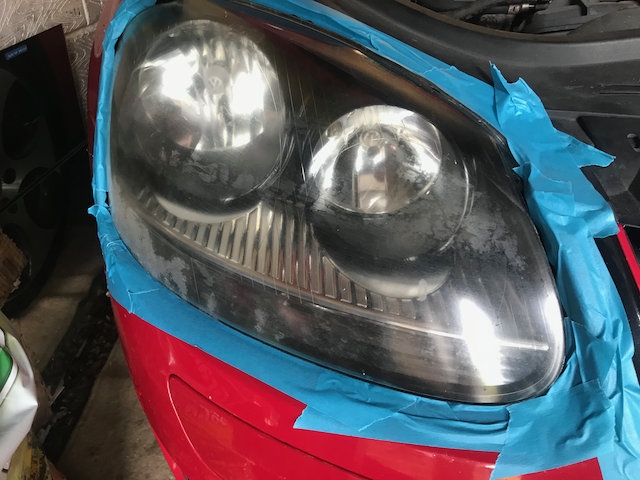
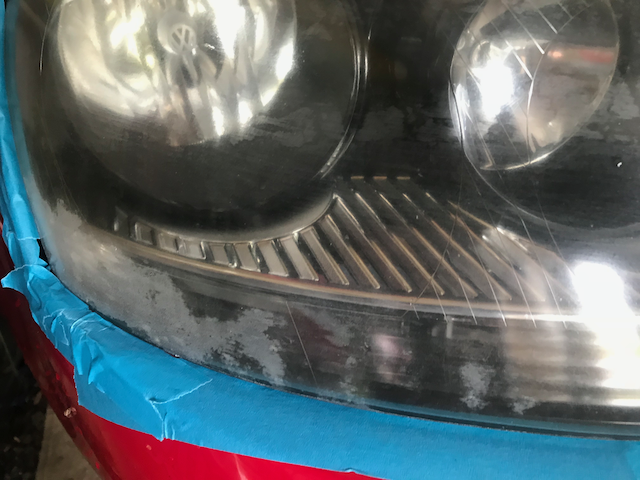
Process - Note : if you can remove the headlights then that is better, if not you will need to mask off the headlights from the rest of the car as you dont want to get sandpaper anywhere near the bodywork ! Use special auto masking tape (low tack) if you can or similar. and tape all around the headlight giving yourself at least 2 inches of buffer zone.This pictures illustrates the taping off and also a recent headlight with bad oxidation.
Basically you are sanding the headlights and then protecting them. You are wet sanding in this process so get yourself familiar with the difference between wet and dry sanding. You will need various grades of wet and dry sandpaper (generally black in colour) ranging from 240 through to 2000-3000. The lower the number the more abrasive the grade but the lowest number is not necessarily the grade you need to start with. This is dependant on how bad your headlights are, the level of discolouration etc so I advocate starting with a medium grade, say 400 and if that is not enough then use a lower grade and then work back up.
Example : the aim is to remove all the film and grime and discolouration but the lower the grade the more scratches you will introduce so you need to find the right balance. So if its bad and you start with 600 and it makes a difference then great you can move on but if it still looks discoloured then drop to 400 and look again. If it is clear of discolouration then go back to 600 and so on.
Process - Note : if you can remove the headlights then that is better, if not you will need to mask off the headlights from the rest of the car as you dont want to get sandpaper anywhere near the bodywork ! Use special auto masking tape (low tack) if you can or similar. and tape all around the headlight giving yourself at least 2 inches of buffer zone.This pictures illustrates the taping off and also a recent headlight with bad oxidation.
|
|
With the wet and dry paper grades, a bucket with warm water and a few drops of washing up liquid you are good to go. Go across the whole headlight in small sections using vertical and horizontal strokes (not circular). As you do this you will see the colour of the water change from clear to a lovely brownish colour. Nice ! This is the oxidation coming off. Once you have done the first pass, rinse and wipe off with a work towel or dirty micro fibre cloth. Dont use anything you value as you will end up throwing it away.
Dont panic ! at this stage most people will be freaking out as the headlight will be hazy and scratched. dont panic, we will be removing the scratches in the process as you step up in grades. Repeat the process in the grades of wet and dry, sand, rinse and wipe down. As you move up you will notice that the scratches start getting finer and eventually are minimal especially at the highest levels around 1500-2000. Here you will see micro abrasion marks but these are removed in the next stage.
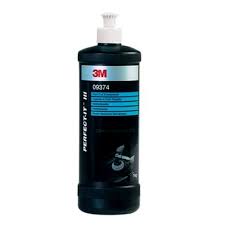
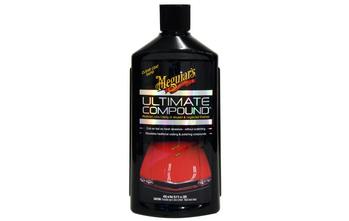
Cutting- once complete on the sandpaper now is the time to polish. Now here you can use any polish of your choice but I suggest a cutting compound. Products can be like 3M or Meguiars Paint compound. Below are just two I recommend.
|
|
If you have a machine polishing then perfect, if not you will need a foam applicator and a product like above and work this into the headlight to remove the micro abrasions as detailed above. No water is needed, just work the product in using horizontal and vertical strokes. Then wipe off with a micro fibre cloth and inspect. If the swirls and scratches are gone then you can move onto the next stage, if not a second pass will be required.
Polishing- now its time to polish and you can use any product of your choice. You are now just adding shine and clarity to the headlight so just as you would with the body work, there tends to be no cutting or abrasion in these products, just glaze or a gloss.
By hand or machine again work the product in and wipe down and you are into the last and final stage.
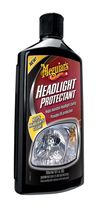
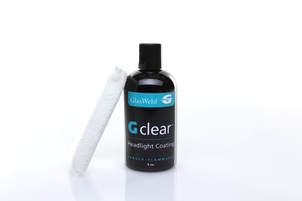
Protection- despite all these stages and your hard work, it won't last for ever and so you need to find a way to seal the lights. Many products on the market ranging in price so work according to your budget. Some will last 6 months, some less but either way you have to be prepared to protect at some stage again unless you go down the route of using a clear film or headlight bra. That is your choice but below are two products that I have used. Both offer a decent sealant. The method is simply wipe on, leave to haze and then gently buff.
|
|
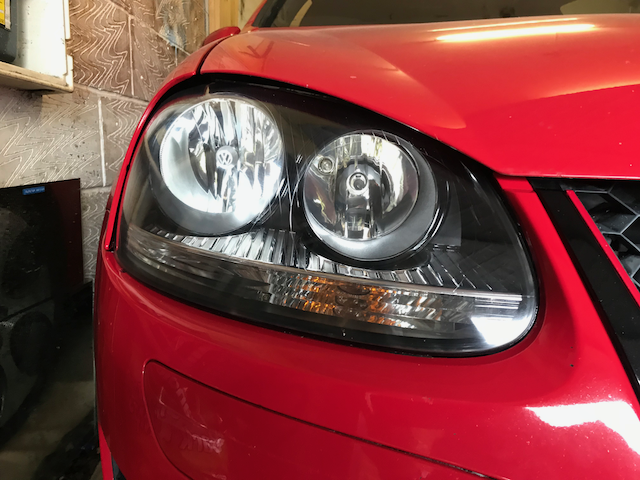
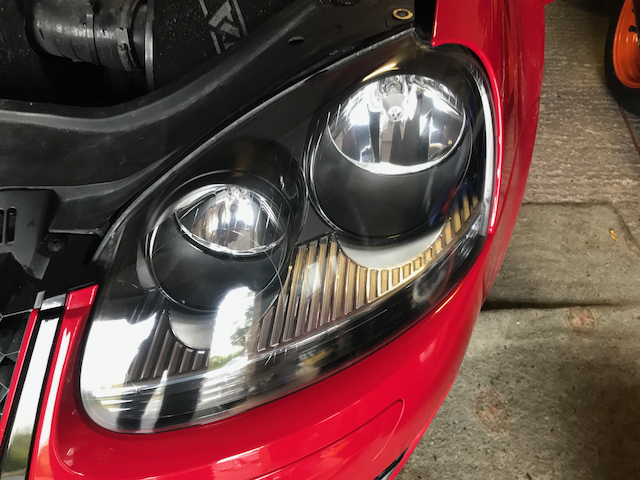
The results- after all that you should end up with a pretty good set of clear and haze free headlights so step back and admire all your hard work and efforts.
|
|
|
If you would like to download all the information contained in the HEADLIGHT RESTORATION guide, simply click on the link to the right. It is in PDF format.
|
| ||
